How to Read Professional Landscape Designs
How to Read Professional Landscape Designs
Have you ever looked at a landscape design plan and said: “I’m completely lost in the maze of lines, symbols, and shapes”?
Do you wish you knew how to read professional landscape designs so you could be confident in knowing exactly what your designer is proposing before construction begins?
This guide will walk you through the key elements of a professional landscape design and help you understand how to interpret boundaries, plants, elevations, lighting, and hardscapes. By the end, you will know how to read professional landscape designs and feel confident in the layout of your outdoor space, and get a real idea of what your dream space will look like!
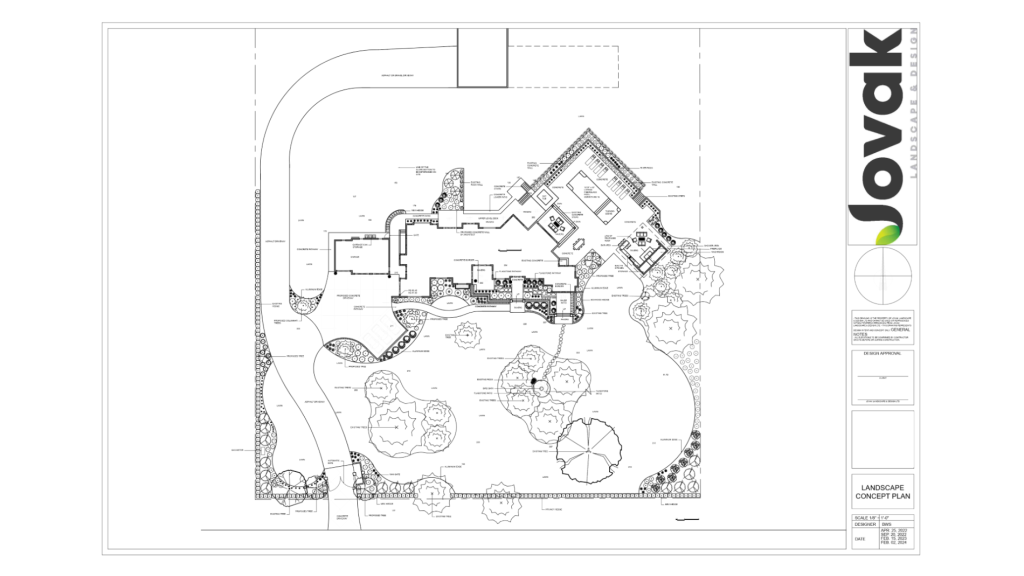
1. Overall Layout of a Landscape Plan
The layout is the “big picture” of your property. It outlines boundaries, structures, and the flow of spaces.
- Property Boundaries: Shown as solid or dashed lines.
- Paths & Driveways: Represented by curved or straight lines.
- Scale & North Arrow: Always check the scale bar (e.g., 1/8″ = 1′-0″) and the north arrow to orient your plan to your yard.
- Legend/Key: Found in a corner, it explains symbols used in the drawing.
Pro Tip: Always locate the north arrow first. It orients you before reviewing other details.

2. Identifying Existing Buildings and Features
Your plan will show what’s already on your property.
- Buildings: Bold outlines or shaded shapes labeled “Existing House” or “Garage.”
- Driveways & Steps: Often hatched and labeled (e.g., “Existing Concrete Driveway”).
- Other Features: Pools, sheds, or fences drawn to scale and labeled.
- Underground Utilities: Dotted lines may indicate pipes or wiring.
Look for labels like “Existing” to distinguish what stays from what’s new.
3. Reading Elevations and Grading Symbols
Elevation notes show slopes, drainage, and changes in height.
- Spot Elevations: Numbers like 100.5’ mark elevation points.
- Slope Arrows: Indicate downhill (or steps) direction.
- Proposed Grade: Notes planned changes to elevation.
If you see “Proposed Grade”, it means earthwork will reshape your yard.
4. Garden Beds and Planting Areas
Garden beds add structure, colour, and interest.
- Shapes: Irregular “blobs” outlined with lines.
- Patterns: Hatch marks or dots for mulch or ground-cover.
- Plant Keys: Letters or numbers tied to a plant list.

5. Identifying Plants and Trees on a Plan
Plant symbols represent type, size, and location without cluttering the drawing.
- Trees: Circles with a dot or cross. May say “Existing Tree” or “Proposed Tree”.
- Shrubs/Perennials: Small circles or squiggles grouped together.
- Ground-cover: Hatched or stippled areas.
- Plant List: A table naming species, quantities, and sizes. Plant lists could also be located on a separate ‘Planting Plan’.
Circles with crosses are trees; squiggles are shrubs. Simple once you know!
6. How to Spot Lawn Areas
Lawns are open grassy zones for play and relaxation.
- Representation: Blank or lightly hatched spaces.
- Labels: Marked “Lawn”, “Turf”, or “Sod.”
Lawns are usually the largest open areas. Look for unshaded spaces labeled clearly.

7. How to Read Landscape Lighting Symbols
Lighting ensures safety, highlights key features and adds ambiance to your space.
- Symbols: Small solid black circles, triangles, or squares.
- Labels: “Path Light”, “Uplight”, or “Low Voltage Light”.
- Notes: May include “LED” or power details.
Black triangles or dots usually mean lighting. Check labels or legend for type.
8. How to Interpret Hardscape Features (Non-Plant Elements)
Hardscape features structure the outdoor living space.
- Patios/Decks: Hatched rectangles labeled “Concrete Patio” or “Wood Deck”.
- Paths/Walkways: Solid or dashed lines labeled “Gravel Walk” or “Flagstone Path”.
- Water Features: Ovals or shapes labeled “Fountain” or “Pond”.
- Fire Pits & Seating: Circles or squares marked “Fire Pit” or “Bench”.
Hatching patterns reveal materials: brick pattern = pavers, cross-hatch = concrete.
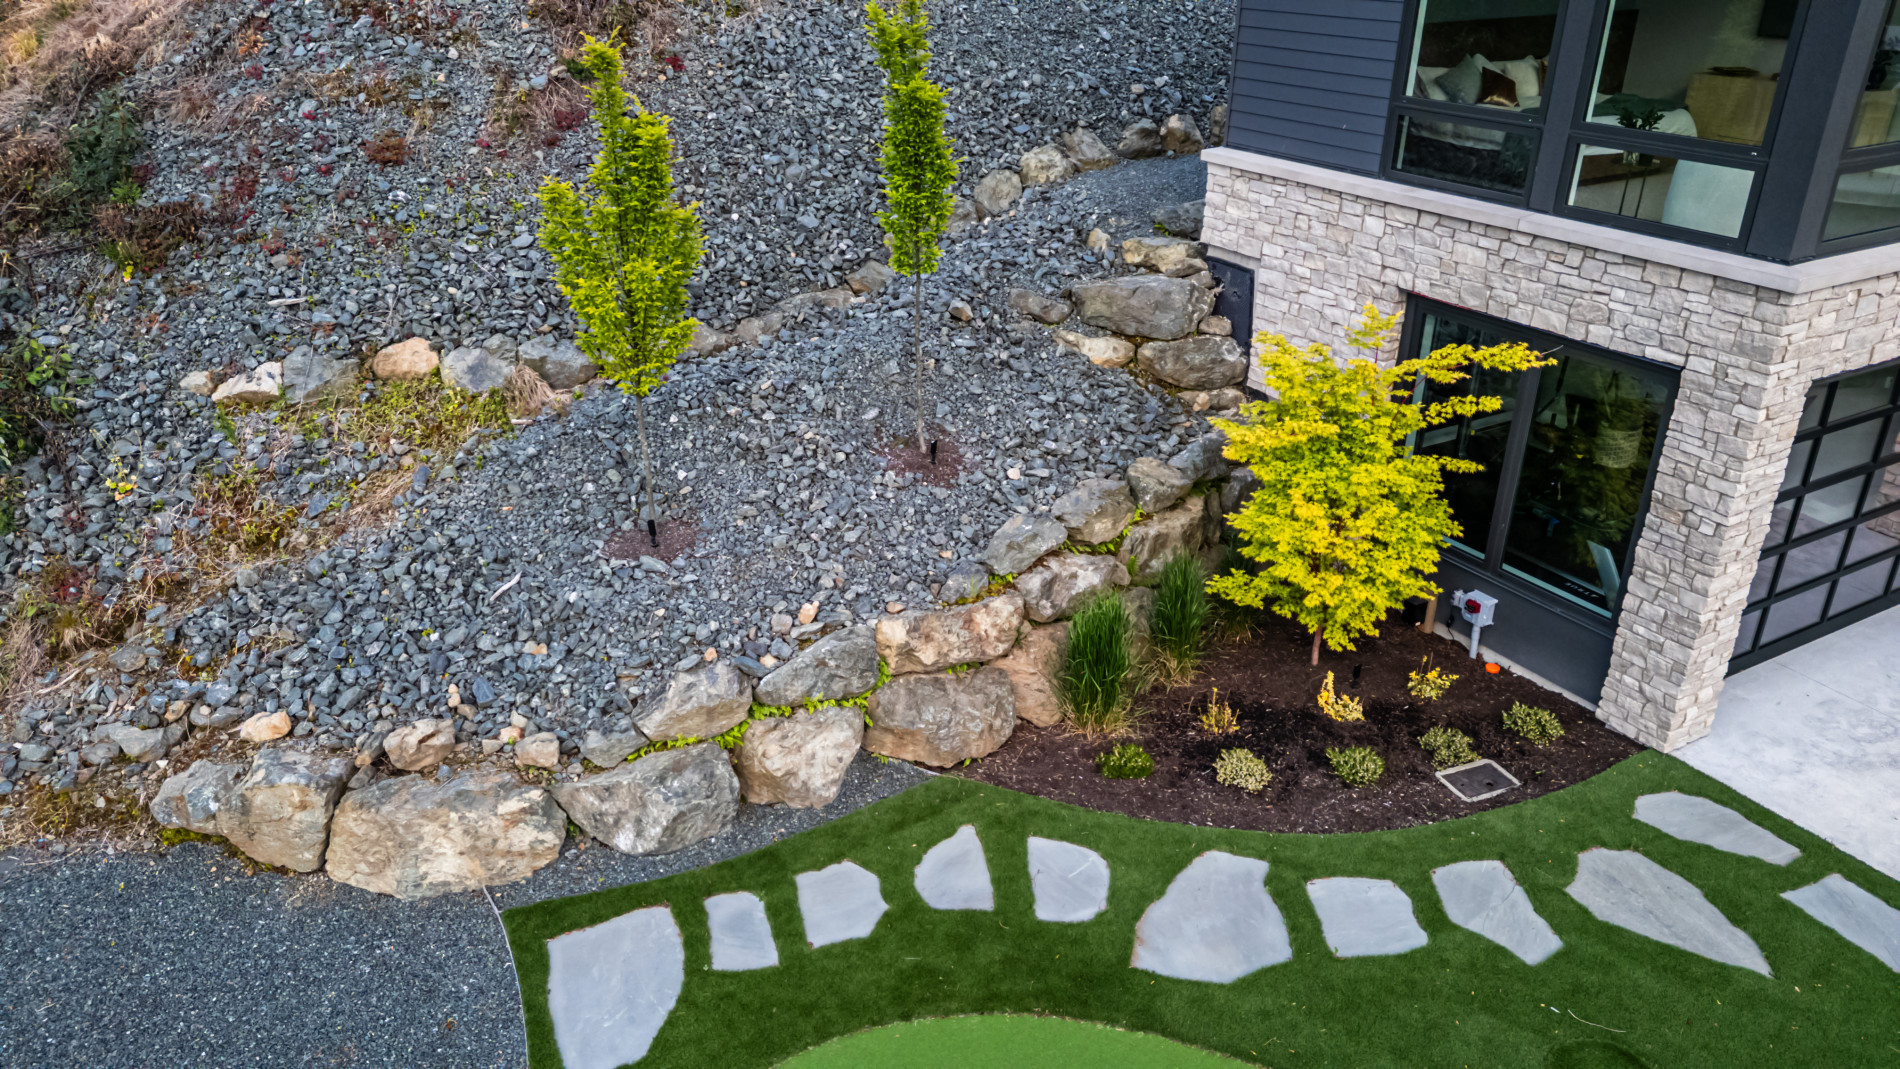
9. Other Common Elements to Watch For
- Boulder Walls: Often drawn as bolded, irregular shapes, placed closely together.
- Water Features: Decorative elements near patios or seating.
Tips for Understanding Your Landscape Plan
- Start Simple: Trace boundaries, locate your house, then look for new vs. existing items.
- Cross-Reference: Match symbols to the plant/materials list.
- Ask Questions: If a symbol isn’t labeled, clarify with your designer.
- Visualize: Walk your yard with the plan in hand.
- Check Dates: Revisions may change the design.
The more you interact with your plan, the more confident you’ll feel.
Conclusion: Visualizing your Future Outdoor Space
At first, your landscape plan may feel like a jumble of lines and circles. Now, you can identify boundaries, elevations, plants, lighting, and hardscapes with confidence.
Your next step? Take your own plan, walk your yard, and match what you see on paper to reality. If questions come up, bring them to your designer. They should help you with any questions you may have.
At Jovak Landscape and Design, we want to guide you through every step of the landscape process and the design is the foundation of how we build your space. With the right plans, you’ll know exactly what’s coming before we get started on your outdoor living space!